
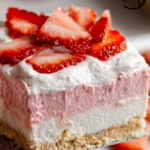
I am absolutely in love with this Strawberry Lush Recipe because it perfectly balances a delightful combination of creamy, fruity, and crunchy textures that feel like a dreamy summer treat. From the buttery crushed Golden Oreo crust to the luscious cream cheese layer and the vibrant strawberry gelatin topping, every bite bursts with fresh flavor that always leaves me wanting more. It’s such a crowd-pleaser and honestly one of my go-to recipes when I want to impress friends or just spoil myself with something sweet and refreshing.
Why You'll Love This Strawberry Lush Recipe
When I make this Strawberry Lush Recipe, what really excites me is how the flavors come together to create something irresistibly delicious. The sweetness of fresh strawberries combined with the smooth cream cheese layer and the subtle crunch of the Golden Oreo crust creates a texture and flavor harmony that feels luxurious yet comforting. I appreciate how the strawberry gelatin adds a playful pop of brightness without overpowering the dessert, making it feel light and fresh rather than heavy.
Another reason I adore this recipe is that it’s surprisingly simple to prepare, which always makes me happy. There’s no baking involved and the steps come together quickly, yet the final result looks like something you’d find in an upscale bakery. It’s perfect for holidays, potlucks, summer barbecues, or even a casual weeknight treat. Whenever I serve it, I always get compliments and requests for the recipe, which tells me it truly stands out.
Ingredients You'll Need

This recipe calls for an easy-to-find set of ingredients that come together to deliver a dessert both visually stunning and mouthwateringly tasty. Each ingredient plays a vital role, from the buttery Golden Oreo crust giving a richness and crunch, to the fresh strawberries adding vibrant color and brightness, to the cream cheese and whipped topping creating the smooth, dreamy layers. It’s a thoughtfully balanced list that anyone can quickly gather and enjoy making.
Tip!
You’ll find all ingredient quantities in the recipe card below.
- Golden Oreos: These create a sweet, buttery crust with a bit of crunch that’s perfect for this no-bake dessert.
- Butter: Melts into the Oreo crumbs to help bind the crust and add richness.
- Strawberry gelatin: Gives the dessert its signature fruity layer and beautiful color.
- Water (boiling and ice cold): Essential for dissolving and setting the gelatin just right.
- Cream cheese: Adds smooth, tangy richness that contrasts deliciously with the sweet layers.
- Powdered sugar: Sweetens the cream cheese filling evenly without any grit.
- Vanilla extract: Enhances the filling with a warm, comforting note.
- Whipped topping: Provides lightness and volume to both the cream cheese layer and the gelatin mix.
- Fresh strawberries: Diced and fresh, they bring freshness and a juicy burst on top of the dessert.
Directions
Step 1: Start by greasing the bottom of a 9 x 13-inch baking dish with butter or shortening. This will prevent the crust from sticking and make serving much easier later on.
Step 2: Crush the Golden Oreos in a food processor on high speed until they turn into fine crumbs. While the processor runs on low, slowly pour in the melted butter until the crumbs begin to clump together — this signals the crust mixture is perfect.
Step 3: Pour the crumb mixture into your greased pan and press it down firmly with the back of a spoon or your hands to form an even crust layer. Then freeze the crust for at least 20 minutes so it firms up nicely.
Step 4: While the crust sets, whisk together the strawberry gelatin powder and boiling water in a large bowl until completely dissolved. Slowly add the cold water while continuing to whisk to cool down the mixture evenly, then fold in one third of the whipped topping gently to keep the airy texture intact. Pop this mixture into the fridge for later.
Step 5: In a separate bowl, beat the cream cheese, powdered sugar, and vanilla extract together using an electric mixer until smooth and fluffy. Add another third of the whipped topping and mix on low speed until the filling is creamy and well combined.
Step 6: Remove the crust from the freezer and spread the cream cheese mixture evenly over it. Then check on the gelatin mixture; if any separation has occurred, stir it gently and pour it over the cheesecake layer.
Step 7: Cover the entire dish tightly with plastic wrap and chill in the refrigerator for at least 4 hours or until the gelatin layer is fully set.
Step 8: Once ready to serve, spread the remaining whipped topping evenly over the top of the dessert and smooth it out carefully. Finally, sprinkle the diced fresh strawberries over the surface for a bright, juicy finish.
Servings and Timing
This Strawberry Lush Recipe makes about 12 generous servings, making it fantastic for larger groups or parties. Prep time is around 20 minutes, with no actual cooking needed aside from boiling water for the gelatin. Most of the work happens in chilling and setting times, so you’ll need to plan for at least 4 hours of refrigeration after assembly and another 20 minutes to firm the crust initially. Overall, the total time is about 4 hours and 30 minutes. It’s wonderful to prepare ahead of time, too, so you can relax when guests arrive.
How to Serve This Strawberry Lush Recipe

When I serve this Strawberry Lush Recipe, I love to keep the presentation simple but inviting. I usually cut it into square portions and arrange them on a pretty dessert platter or individual plates with a fork ready. It’s best served chilled, as the cool layers hold their shape beautifully and the flavors are most refreshing when cold, especially on warm days.
This dessert pairs wonderfully with a light accompaniment like a scoop of vanilla ice cream or a dollop of extra whipped cream for those who want even more indulgence. I also enjoy garnishing with fresh whole strawberries or a small sprig of mint for a pop of color and an elegant touch. For drinks, a chilled sparkling rosé or a fruity white wine complements the strawberry notes perfectly. If you prefer non-alcoholic options, a crisp lemonade or iced green tea offers a lovely balance.
This recipe shines at family gatherings, summer barbecues, baby showers, or any festive occasion where you want something pretty but not overly complicated. It’s always a hit with both adults and kids, and the portion sizes are just right for easy sharing. Trust me, once you try serving it this way, it’ll become your favorite showstopper dessert.
Variations
I love that the Strawberry Lush Recipe is incredibly versatile and easy to customize depending on what you have on hand or your personal dietary preferences. For example, if you want a gluten-free crust, I substitute the Golden Oreos for gluten-free vanilla cookies, which still create that same buttery crunch. You can also swap the strawberry gelatin for a sugar-free or natural gelatin alternative if you want a cleaner label.
If you’re vegan or dairy-free, I’ve experimented with dairy-free cream cheese and coconut whipped toppings, and the results are surprisingly delicious. Just keep in mind the flavors will shift a bit, but it’s a great way to enjoy this dessert while accommodating different diets.
To add a flavor twist, I sometimes mix in a little fresh lemon zest or swap the strawberries for raspberries or blueberries for a different berry profile. You can even layer in some white chocolate chips or toasted coconut flakes between layers for extra texture and sweetness. If you want to speed things up, no-chill versions exist but I definitely recommend letting all layers set properly for the best texture and look.
Storage and Reheating
Storing Leftovers
Since this Strawberry Lush Recipe is best enjoyed chilled, I store leftovers in an airtight container or cover the baking dish tightly with plastic wrap and keep it in the refrigerator. It will stay fresh and delicious for up to 3 days. The flavors may even meld a little more after resting overnight, so leftovers often taste just as good or better.
Freezing
I don’t usually freeze Strawberry Lush because the gelatin layer can lose its texture, and fresh strawberries may become watery when thawed. However, if you want to freeze it, I recommend removing the fresh strawberry topping first and freezing the dessert in an airtight container. It should keep for up to 1 month but I suggest thawing it slowly in the fridge and adding fresh berries before serving to restore freshness.
Reheating
This dessert is best served cold and does not require reheating. In fact, heating it will melt the gelatin and cream cheese layers, ruining the texture. Just make sure to serve it straight from the refrigerator or allow it to sit at room temperature for 10 minutes if it feels too firm. That gentle warming will soften the cream cheese layer slightly without compromising the overall integrity.
FAQs
Can I use fresh strawberries instead of frozen?
Yes! I actually prefer fresh strawberries for this Strawberry Lush Recipe because they add a juicy, bright flavor and appealing texture on top. Using fresh diced strawberries enhances the natural strawberry taste, especially when paired with the gelatin layer.
What if I don’t have a food processor to crush the cookies?
No problem at all. I sometimes use a rolling pin to crush the Golden Oreos inside a sealed plastic bag until finely ground. It may take a bit more time, but the crust turns out just as good.
Can I make this dessert ahead of time?
Absolutely! This is one of the best make-ahead desserts. I usually prepare it the day before serving to allow the gelatin and cream cheese layers enough time to set perfectly. It actually tastes better the next day as the flavors have more time to meld.
Is there a way to make this recipe lower in sugar?
Definitely. You can opt for sugar-free strawberry gelatin and reduce or replace powdered sugar with alternatives like erythritol or stevia blends compatible with baking. Just be cautious with sweetener amounts to keep the balance right.
Can I substitute the Golden Oreos for a different cookie?
Yes! Vanilla wafer cookies, graham crackers, or any crisp, sweet cookie will work wonderfully for the crust. Just ensure they crush finely and blend well with the melted butter to form a firm base.
Conclusion
I can’t recommend this Strawberry Lush Recipe enough — it’s one of those special desserts that feels both homemade and elegantly indulgent. With its beautiful layers, fresh strawberry flavor, and simple preparation, it never fails to brighten up my table and put smiles on faces. I hope you’ll give it a try soon and enjoy all the delicious moments it brings as much as I do!
Print
Strawberry Lush Recipe
- Total Time: 4 hours 30 minutes
- Yield: 12 servings
Description
Strawberry Lush is a no-bake, layered dessert featuring a crunchy Golden Oreo crust, a creamy cheesecake filling, and a light strawberry gelatin topping adorned with fresh diced strawberries. Perfectly chilled for at least 4 hours, this dessert balances sweet, tangy, and creamy textures in every bite.
Ingredients
Crust
- 24 Golden Oreos
- 5 Tablespoons butter
- Butter (melted or shortening, for greasing)
Gelatin Layer
- 1 Box strawberry gelatin (3-Ounce)
- ¾ Cup boiling water
- ½ Cup ice cold water
- 24 Ounces whipped topping (thawed, divided into thirds)
Cheesecake Filling
- 16 Ounces cream cheese (at room temperature)
- 1 Cup powdered sugar
- 1 Teaspoon vanilla extract
Toppings
- 16 Ounces strawberries (fresh, diced)
Instructions
- Grease baking dish: Grease the bottom of a 9 x 13-inch baking dish or pan with melted butter or shortening to prevent sticking. Set the dish aside for later use.
- Make the crust: Using a food processor, crush the Golden Oreos at high speed until finely ground. While the processor runs at low speed, gradually pour in the melted butter until the crumbs clump together.
- Press crust into pan: Transfer the buttery Oreo crumbs into the greased pan. Firmly press the mixture evenly into the bottom to create a compact crust layer.
- Freeze crust: Place the crust in the freezer for at least 20 minutes to allow it to set and become firm before adding the filling layers.
- Prepare gelatin mixture: In a large bowl, whisk together the strawberry gelatin powder and boiling water until completely dissolved. Slowly add the cold water while continuing to whisk until combined.
- Fold in whipped topping: Gently fold one-third of the thawed whipped topping into the gelatin mixture, being careful to avoid deflating the whipped topping. Refrigerate this mixture while you prepare the cheesecake filling.
- Make cheesecake filling: In a separate large bowl, beat the cream cheese, powdered sugar, and vanilla extract using an electric mixer until smooth and creamy.
- Add whipped topping to cheesecake layer: Mix in another third of the whipped topping at low speed until fully incorporated, creating a light cheesecake filling.
- Assemble dessert layers: Spoon the cheesecake filling evenly over the frozen Oreo crust, spreading it smoothly with a spatula.
- Combine gelatin layer: Remove the gelatin whipped topping mixture from the fridge and stir gently to recombine any settled gelatin at the bottom.
- Pour gelatin layer: Evenly pour the gelatin whipped topping mixture over the cheesecake layer, covering it completely.
- Chill dessert: Cover the entire dessert with plastic wrap and refrigerate for at least 4 hours, or until the gelatin layer is fully set.
- Add final topping: When ready to serve, spread the remaining third of whipped topping over the set gelatin layer and smooth it out evenly.
- Garnish and serve: Top the dessert with fresh diced strawberries and serve chilled for a refreshing finish.
Notes
- Make sure the cream cheese is at room temperature to ensure a smooth cheesecake filling without lumps.
- Do not overmix the whipped topping into the gelatin to maintain its light and airy texture.
- The dessert must chill for at least 4 hours to allow the gelatin to properly set; overnight chilling is best for clean slices.
- Use fresh, ripe strawberries for the best flavor and texture in the topping.
- Golden Oreos provide a mild vanilla flavor; you can substitute with plain or vanilla wafer cookies if desired.
- Prep Time: 30 minutes
- Cook Time: 0 minutes
- Category: Dessert
- Method: No-Cook
- Cuisine: American


Leave a Reply